
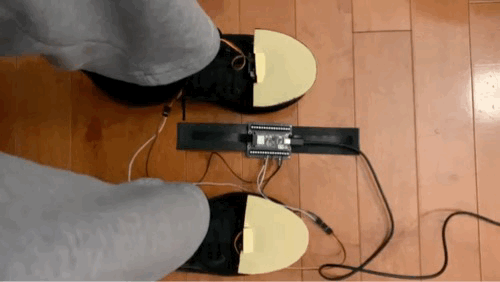
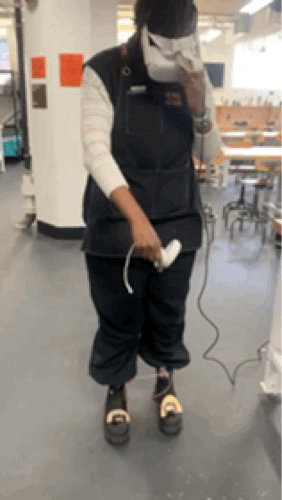
Funky Shoes is a wearable device that seamlessly integrates with virtual reality experiences. This fun and innovative wearable is designed to be attached to the top of your shoes, enhancing the VR experience by reacting to a collision of virtual objects in VR.
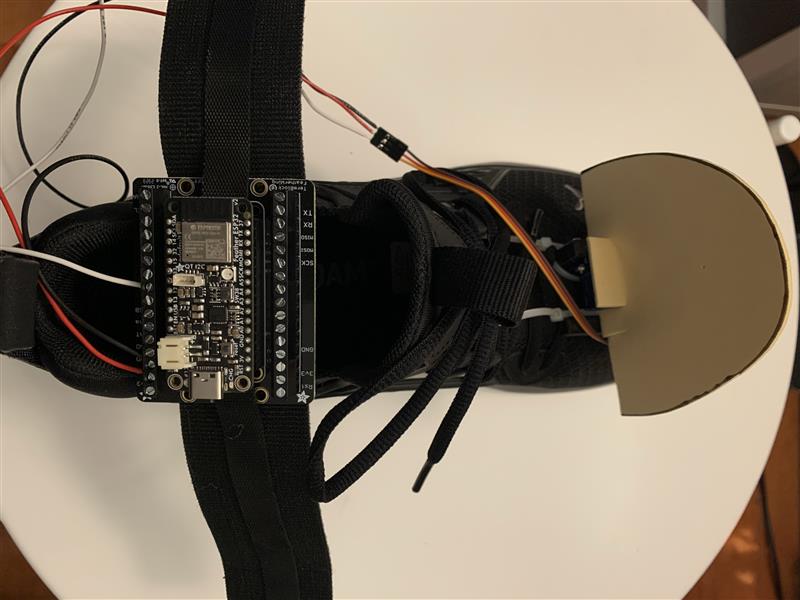
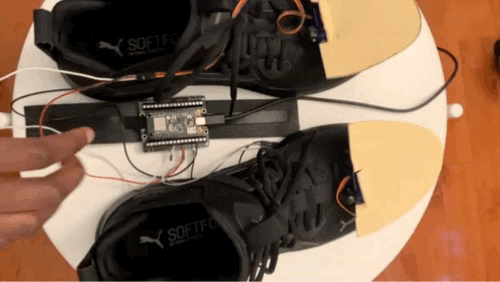
Funky Shoes features two micro servos connected to an Adafruit ESP32 Feather V2 on a breakout terminal block. This tutorial will guide you through the step-by-step process of assembling and configuring Funky Shoes, allowing you to take your VR immersion to a whole new level. Get ready to step into the world of extended realities with Funky Shoes!
What You Need
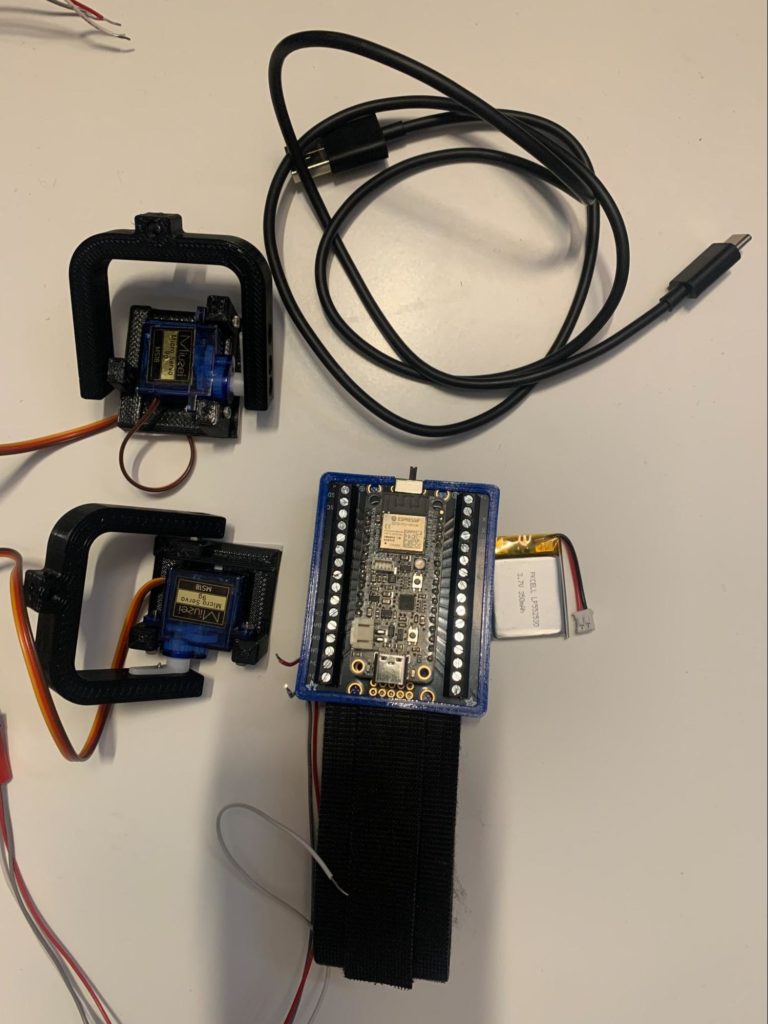
Electronic Supplies
- Adafruit ESP32 Feather VT
- Assembled Terminal Block Breakout FeatherWing for all Feathers
- 2 Micro Servos mounted on 90 Degree 3D printed Servo Mount
- Wires
- 3.7v Lithium Battery
- USB-C Cable
Tools and Materials
- Small Screwdriver
- 3D Printed Feather Casing
- Double sided velcro
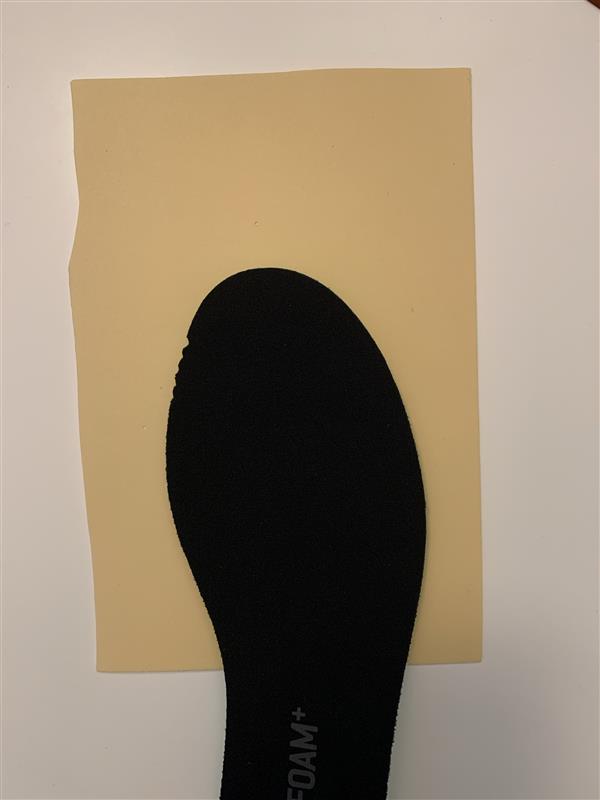
- Craft Foam
- Scissors
- Double-sided Tape
- Markers
- Shoe Insole (optional)
Part 1 – Motors Activated by OnBoard Button
Gather materials
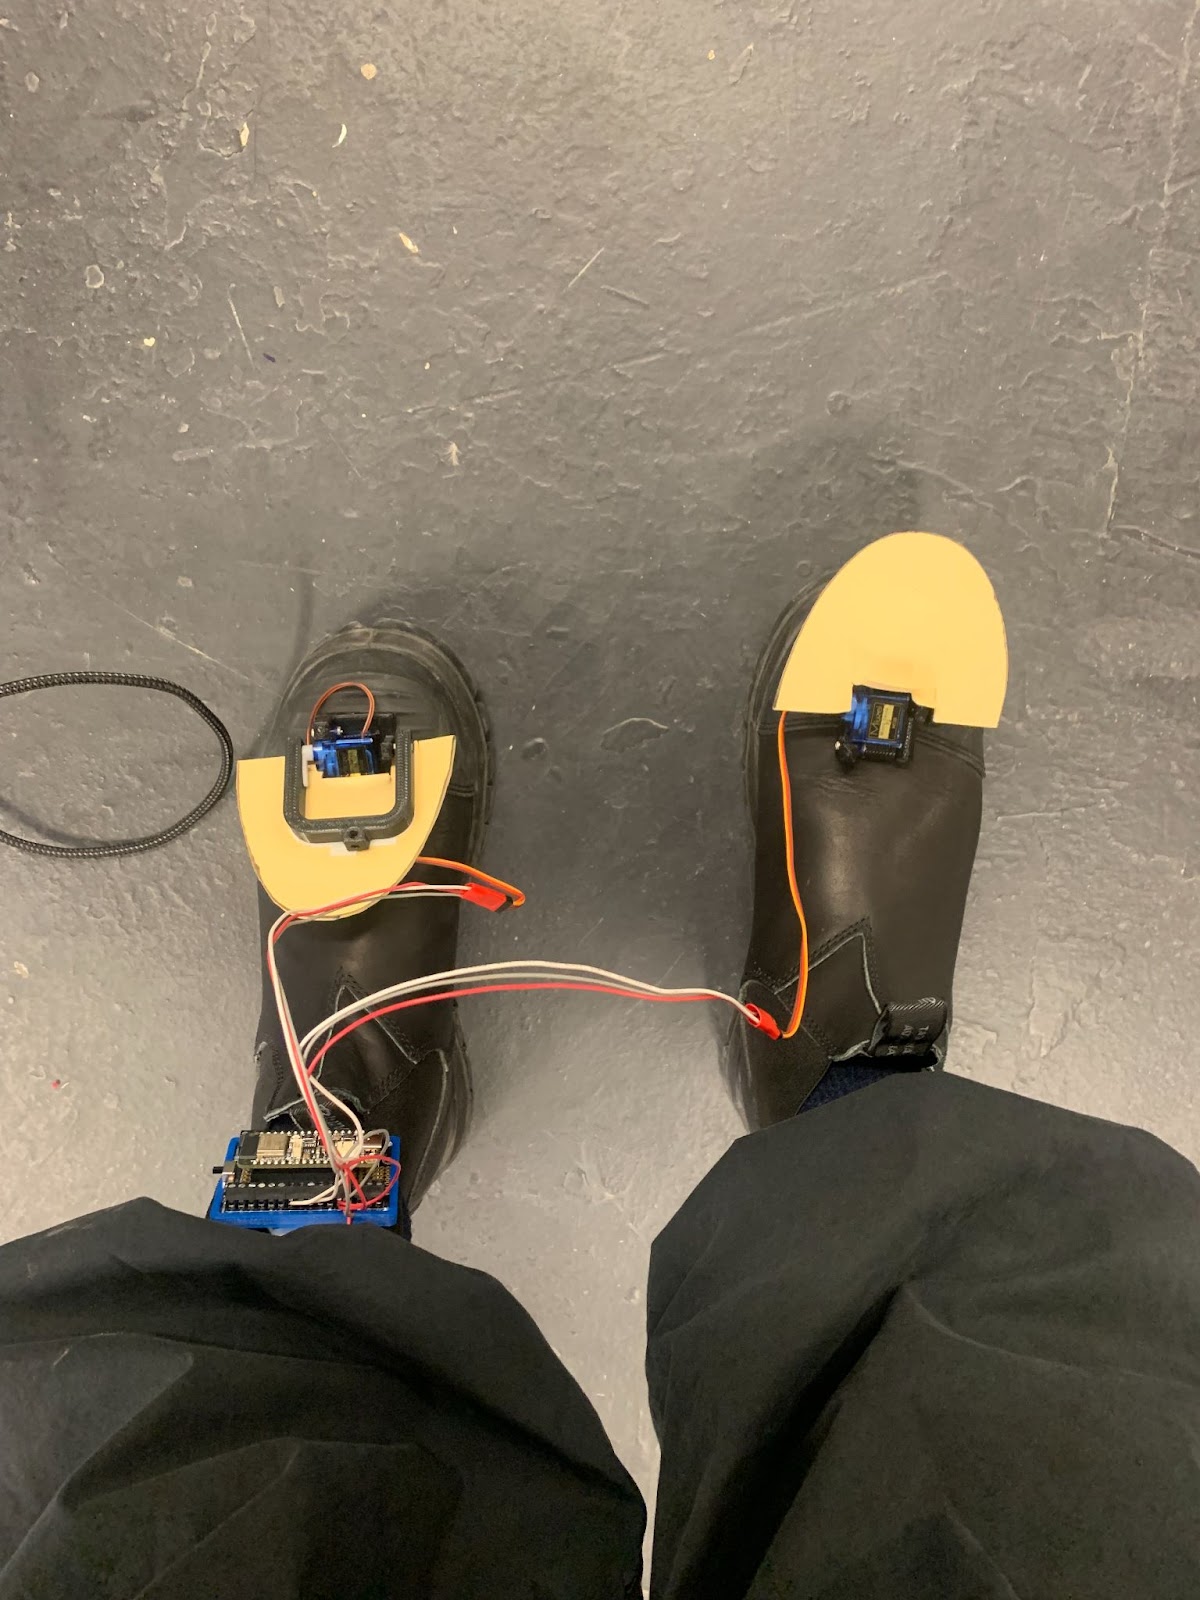
To create Funky Shoes first gather all your materials: Shoe Insole(optional), Markers, Scissors, Craft foam, Motors, ESP32 Feather, 3.7v Lithium Battery, USB-C Cable.
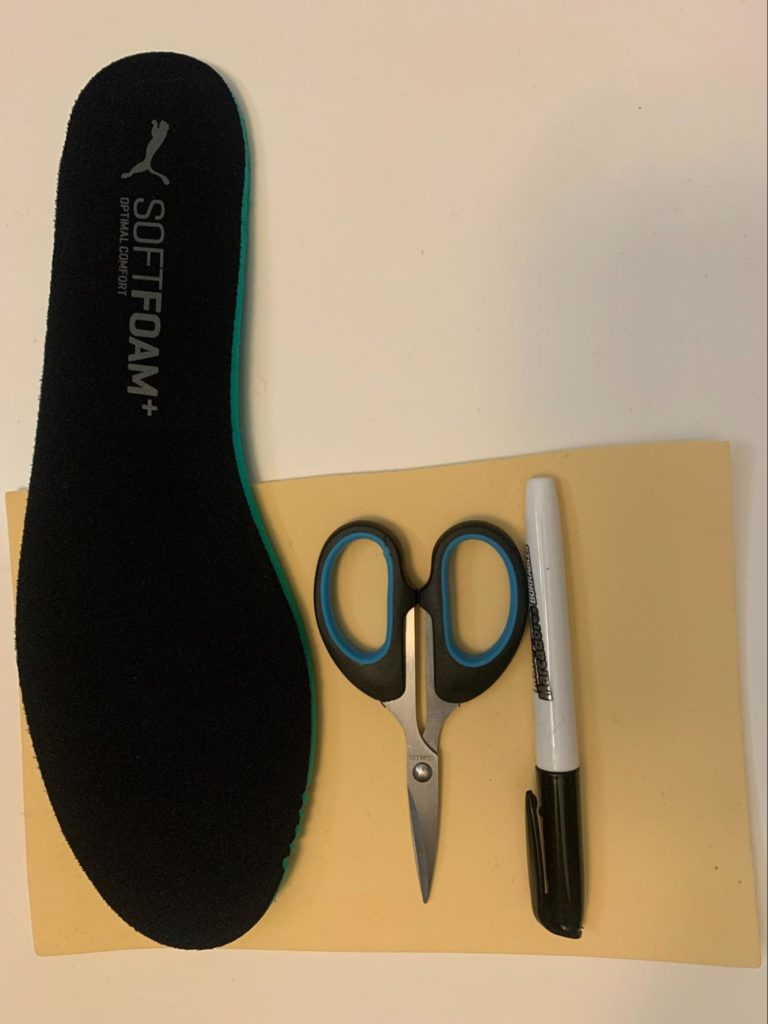
Create cutouts
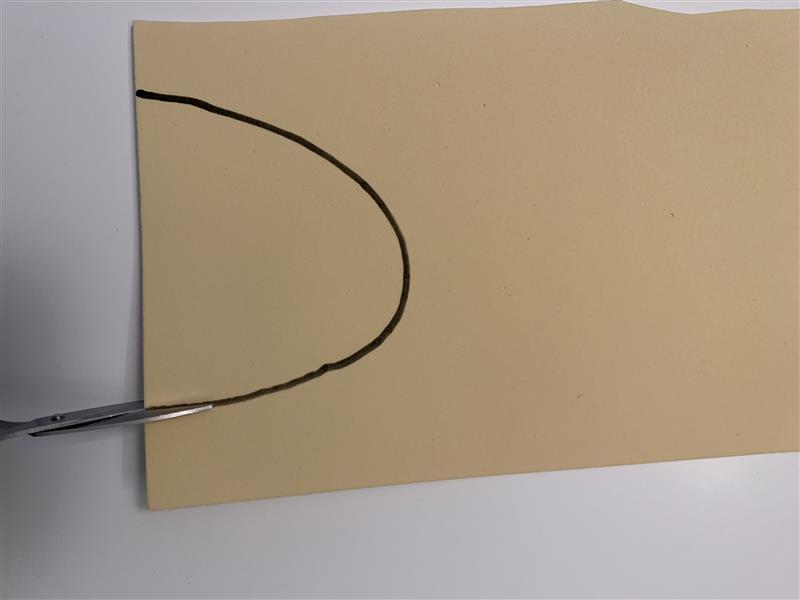
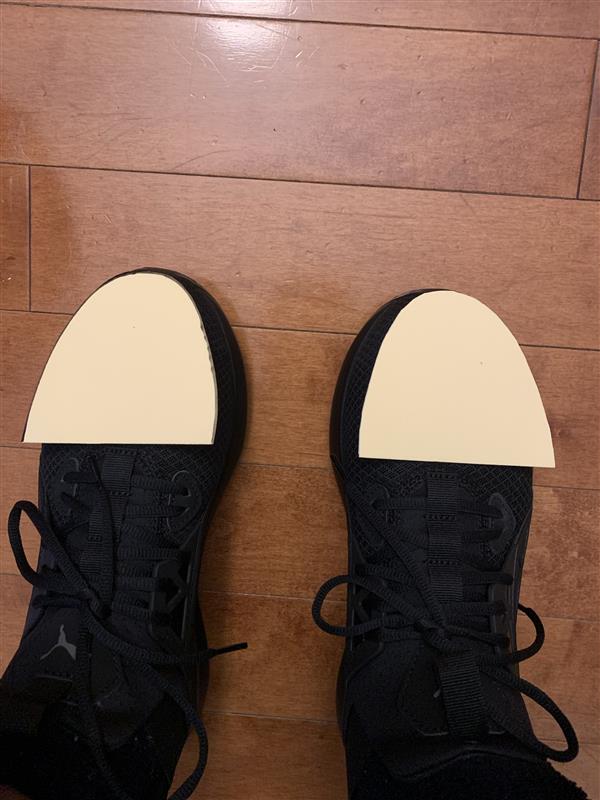
Place the shoe insole over craft foam and outline using a marker.
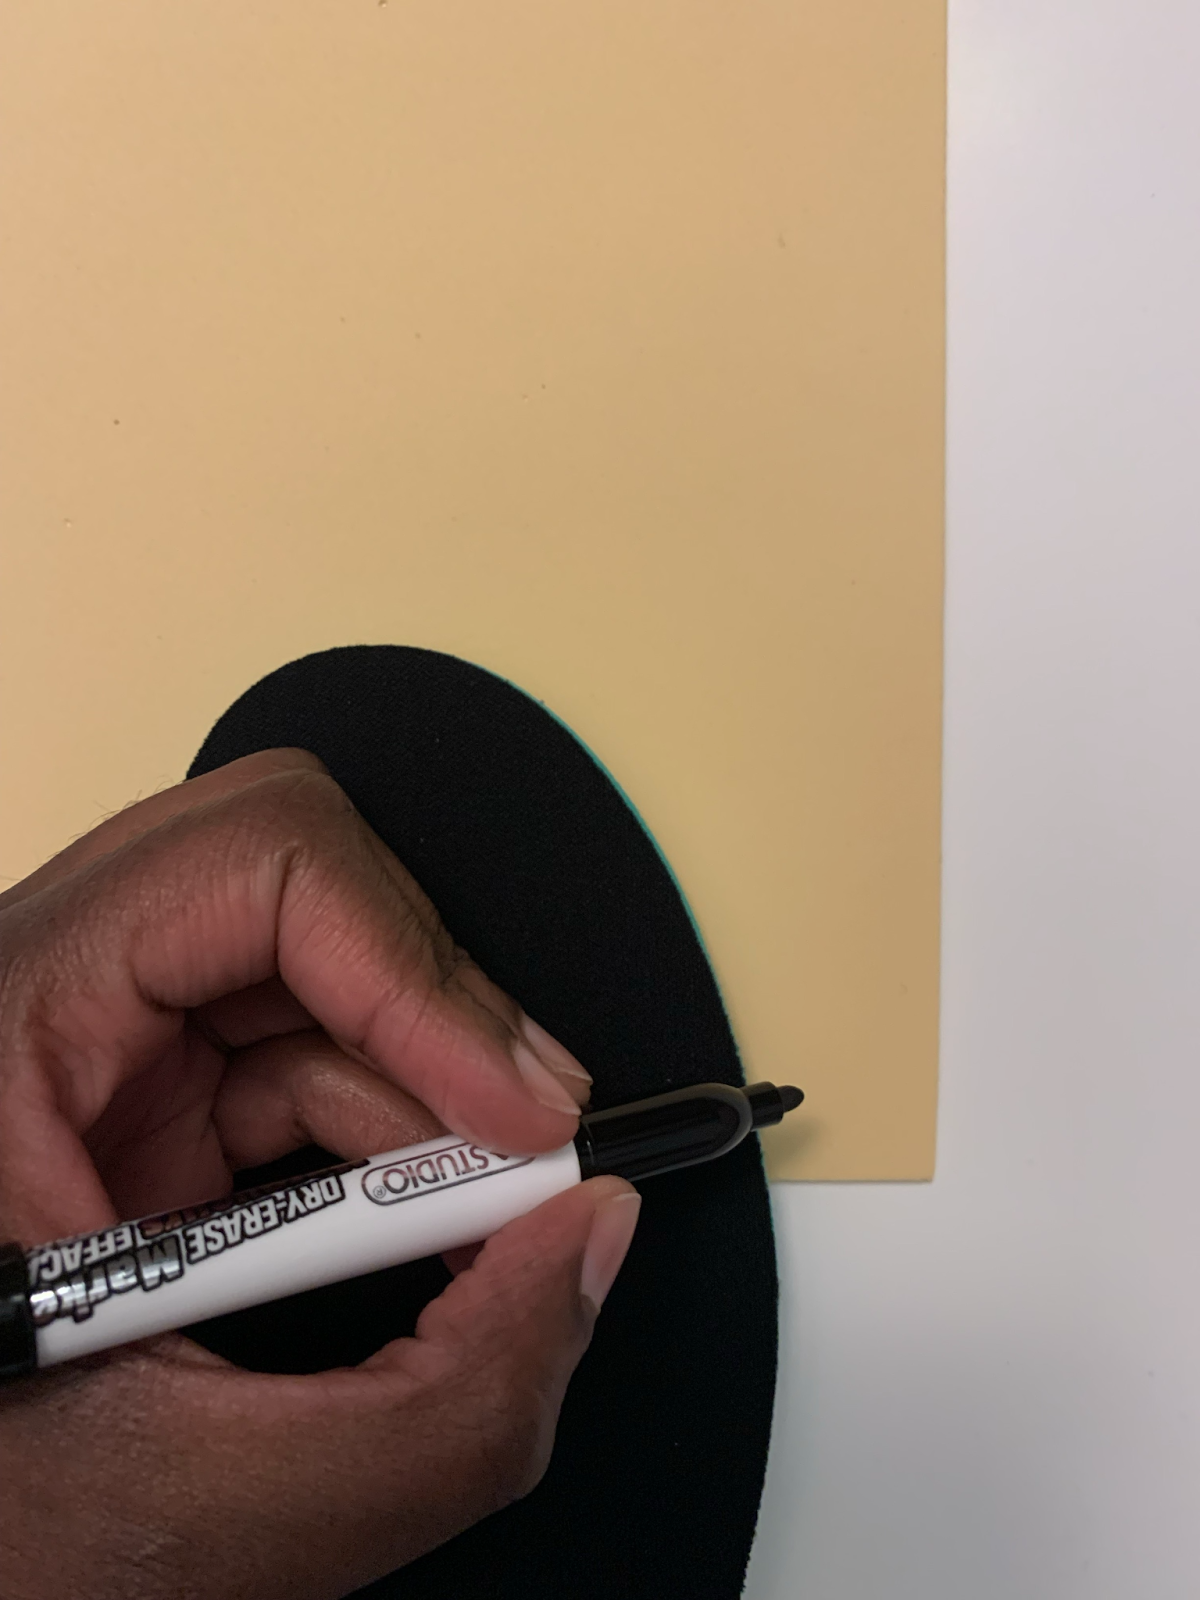
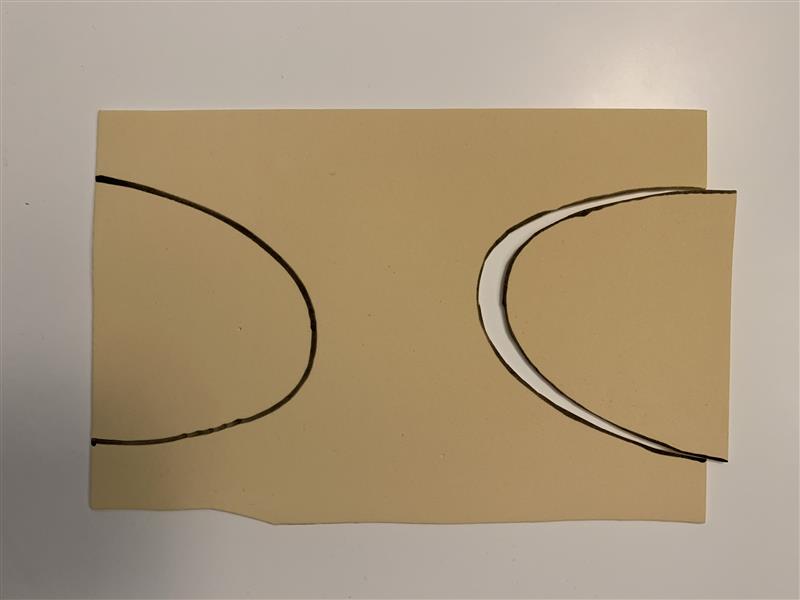
Once you’ve drawn your outline, cut it out using scissors. Feel free to get creative with your designs.

Repeat the process for the second shoe and position the cutouts on both shoes to check the overall appearance.
Attach cutouts to Servo Mount
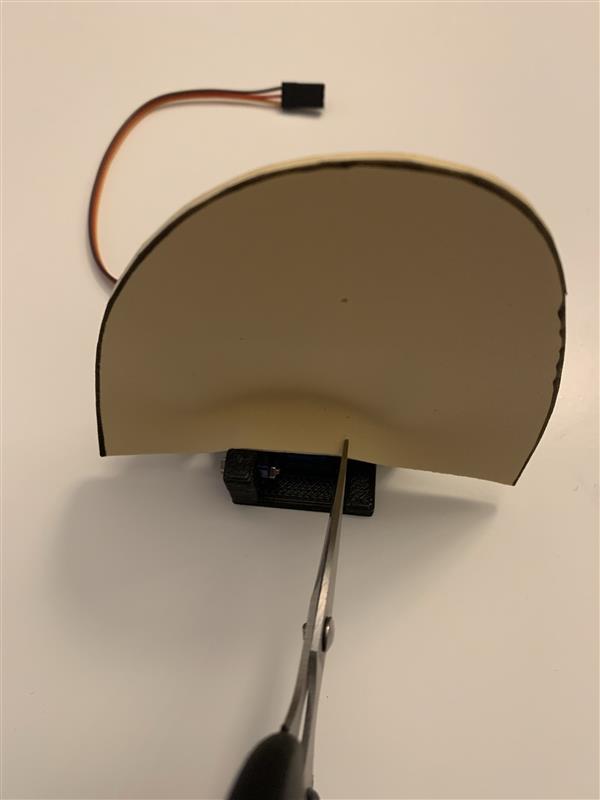
Place double-sided tape onto the servo mount arm. Then affix the cutout craft foam onto the servo mount arm.
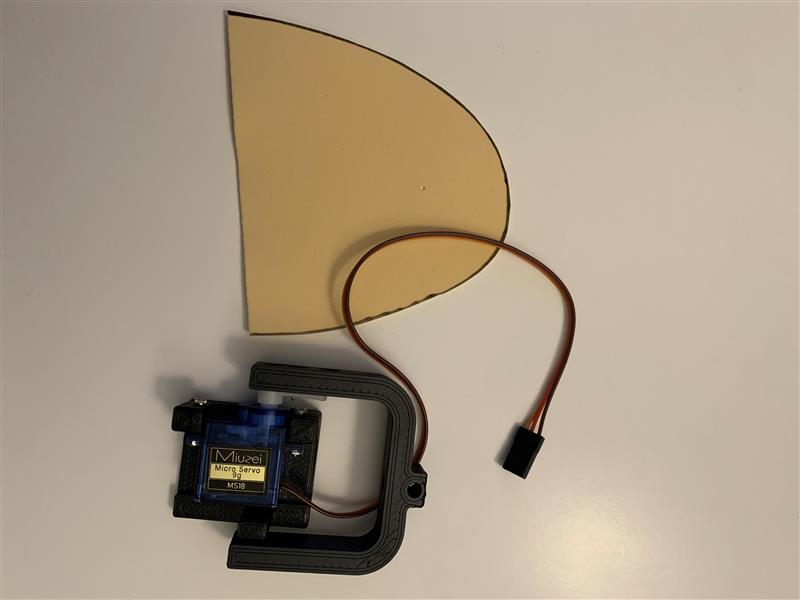
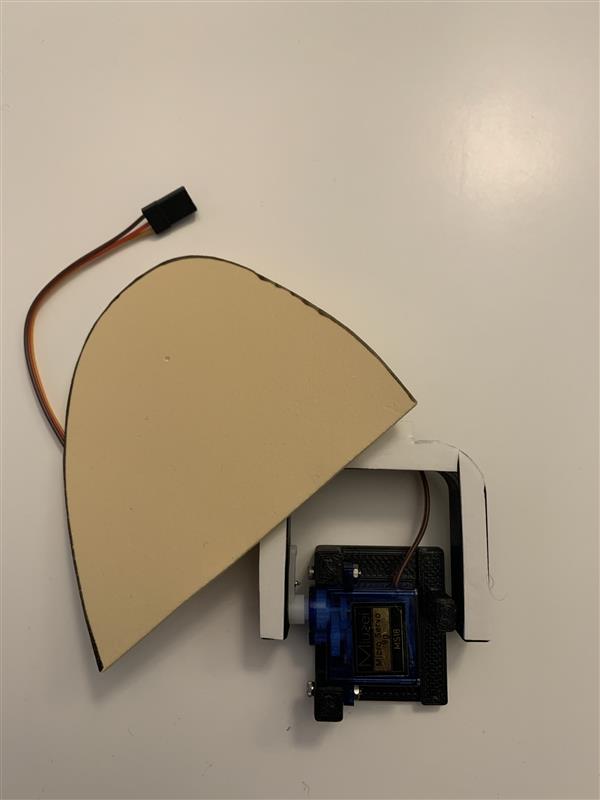
Make some slits on the base of the craft foam to facilitate smooth movement of the servo mount arm.
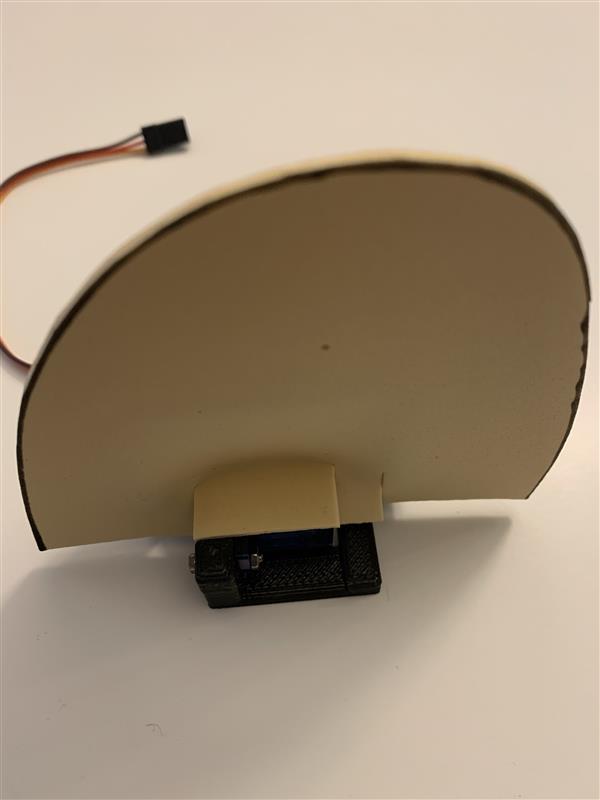
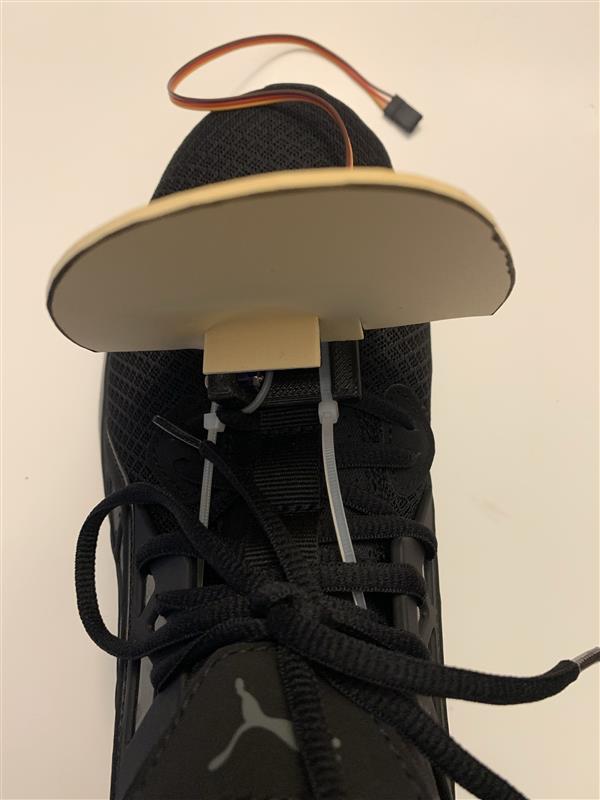
Attach Servo Mounts to Shoes
Attach the servo mount to the shoe (get creative) and connect the servo to Adafruit ESP32 Feather V2.
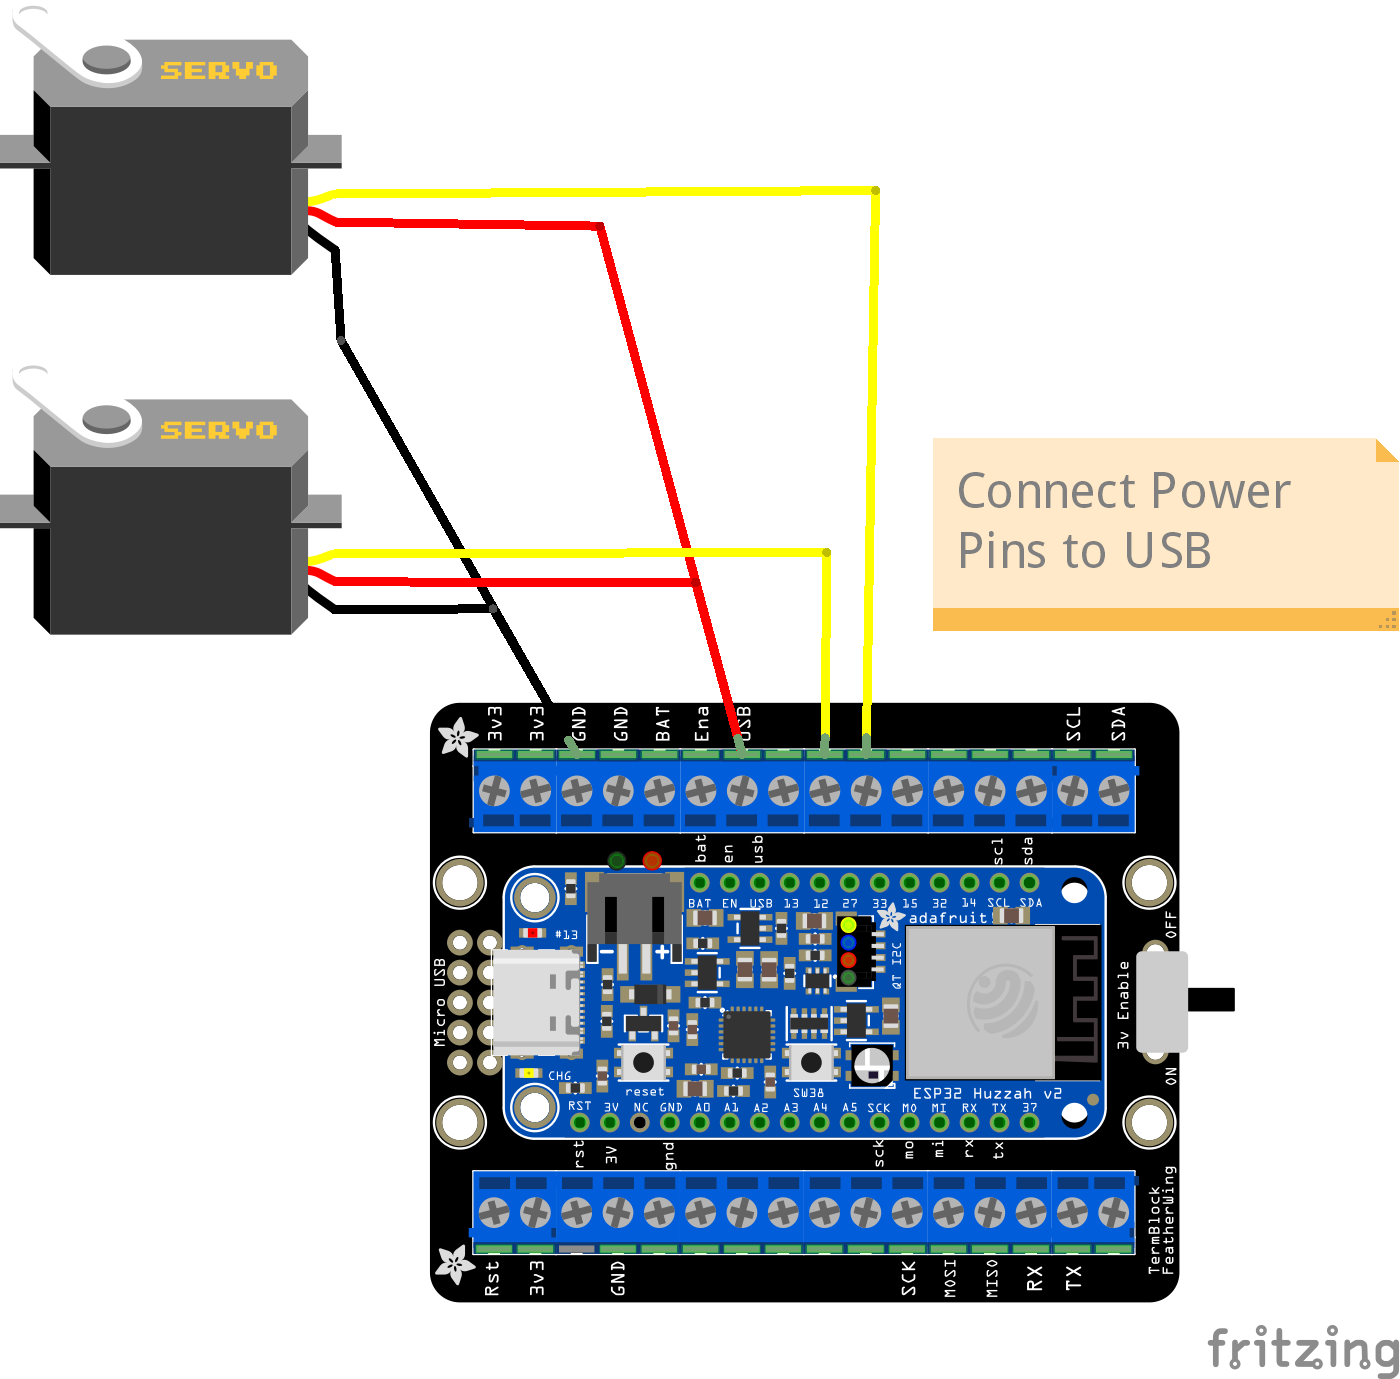
Circuit Diagram
Connect the first servo to Pin 12 and the second servo to Pin 27 on the Assembled Terminal Block Breakout FeatherWing.
Code
Connect the ESP32 feather board to your laptop using the USB-C cable and open Arduino IDE. Download the “ESP32Servo” Library on Arduino IDE. Following the setup guide, select “Adafruit ESP V2 board” and the correct port. Then upload the following code example to your board.
// Two servos controlled by button press code example

#include <ESP32Servo.h>
Servo servo1;
Servo servo2;

const int buttonPin = 38;  // The onboard button is connected to GPIO 38

void setup() {
  Serial.begin(115200);
  servo1.attach(12); //Connect Servo1 (PMW)Orange Wire to Pin 12
  servo2.attach(27); //Connect Servo2 (PMW)Orange Wire to Pin 27
  pinMode(buttonPin, INPUT_PULLUP);
}

// Create sweepServo Function
void sweepServo(Servo &servo) {
  // Sweep the servo from 0 to 180 degrees
  for (int angle = 180; angle <= 0; angle++) {
    servo.write(angle);
    delay(15);
  }

  delay(1000); // Wait for 1 second
  // Sweep the servo back from 180 to 0 degrees
  for (int angle = 180; angle >= 0; angle--) {
    servo.write(angle);
    delay(15);
  }
  delay(1000); // Wait for 1 second
}

void loop() {

  if (digitalRead(buttonPin) == LOW) {
    // Button is pressed, trigger servo movements
    sweepServo(servo1);
    delay(1000); // Wait for 1 second
    sweepServo(servo2);
    delay(1000); // Wait for 1 second
  }
}
Demo Video
Part 2 – Motors Activated by Collision in Unity
What You Need
- Funky Shoes Wearable
- Laptop
- Quest Headset
Upload Arduino code example to ESP32 Feather Board
Plug in the ESP32 feather board to your laptop and open up the Arduino IDE. The code example is a mix of both the setup example script and the servo controlled by button code.
Following the setup guide, select “Adafruit ESP V2 board” and the correct port. Then upload the following code example to your board.
Arduino Code
#include <BluetoothSerial.h>
BluetoothSerial BTSerial;
#include <ESP32Servo.h>
Servo servo1;
Servo servo2;
bool dance = false;
// the setup routine runs on start and once when you press reset:
void setup() {
//change Name_Board_Here to something distinct and memorable -- this is the device name you will see when Bluetooth pairing
BTSerial.begin("ESP32_Trish");
// initialize serial communication at 9600 bits per second:
Serial.begin(9600);
servo1.attach(12); //Connect Servo1 (PMW)Orange Wire to Pin 12
servo2.attach(27); //Connect Servo1 (PMW)Orange Wire to Pin 27
}
// the loop routine runs over and over again forever:
void loop() {
checkForDance();
if (dance) {
sweepServo(servo1);
}
checkForDance();
if (dance) {
sweepServo(servo2);
}
}
// Create checkForDance Function
void checkForDance() {
while (BTSerial.available() > 0) {
String data = BTSerial.readStringUntil('\n');
Serial.println(data);
if (data == "dance") {
dance = true;
} else if (data == "stop") {
dance = false;
}
}
}
// Create sweepServo Function
void sweepServo(Servo &servo) {
// Sweep the servo from 0 to 180 degrees
for (int angle = 0; angle <= 180; angle++) {
servo.write(angle);
delay(15);
}
delay(1000); // Wait for 1 second
// Sweep the servo back from 180 to 0 degrees
for (int angle = 180; angle >= 0; angle--) {
servo.write(angle);
delay(15);
}
delay(1000); // Wait for 1 second
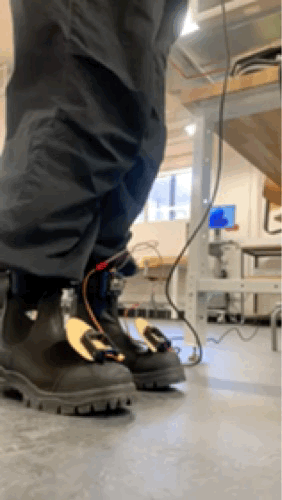
}At this point you can unplug your board and connect your battery so you may wear your Funky Shoes. To make it wearable enough for you to walk use longer wires.
Unity
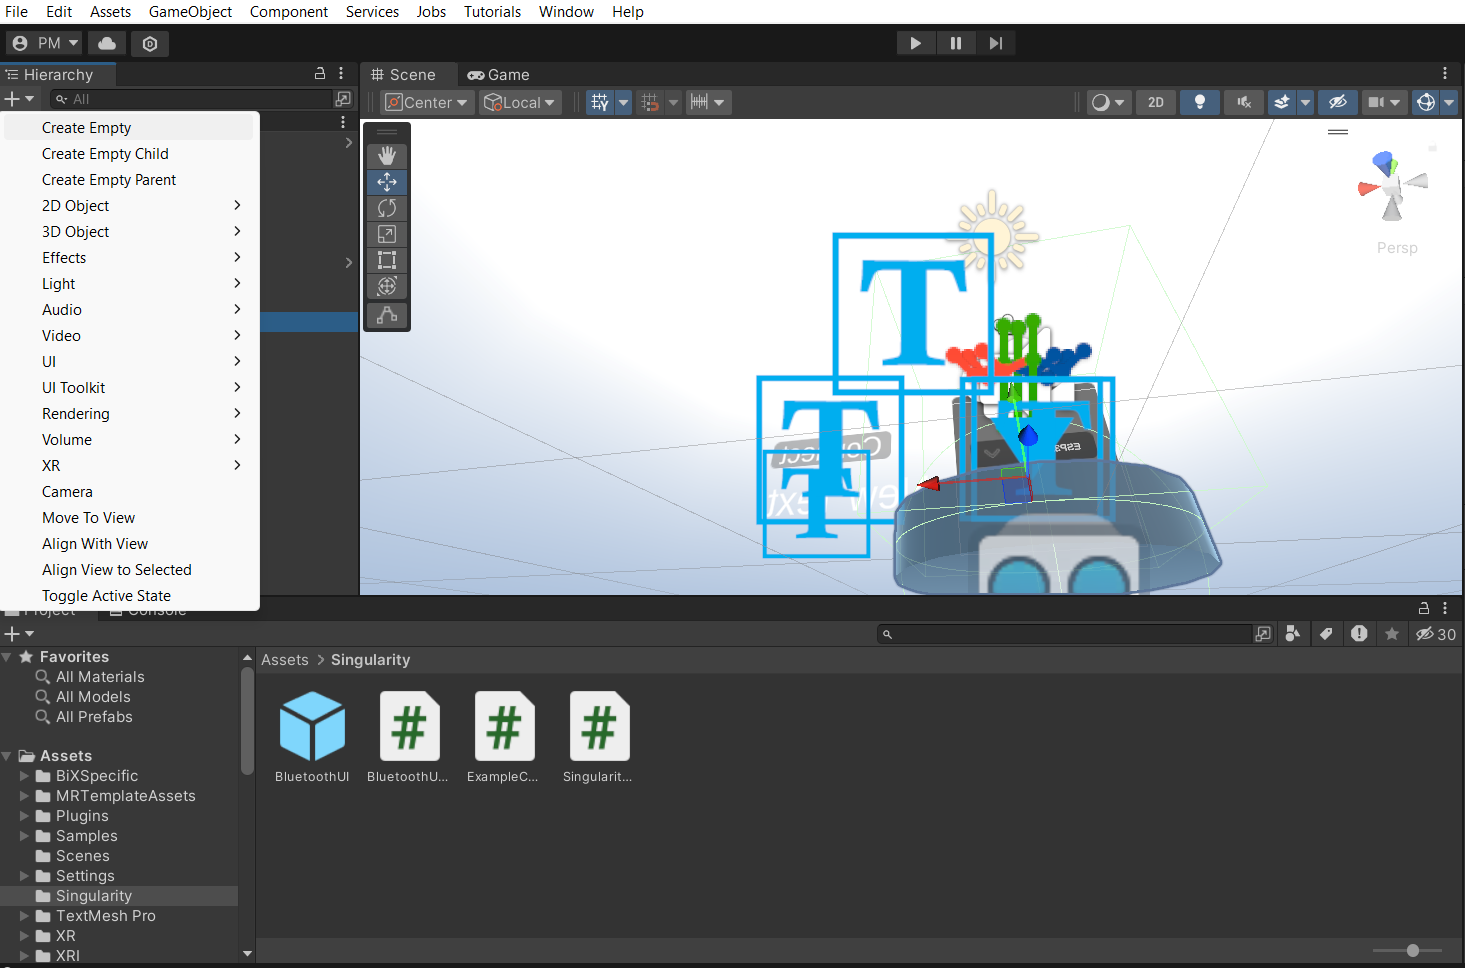
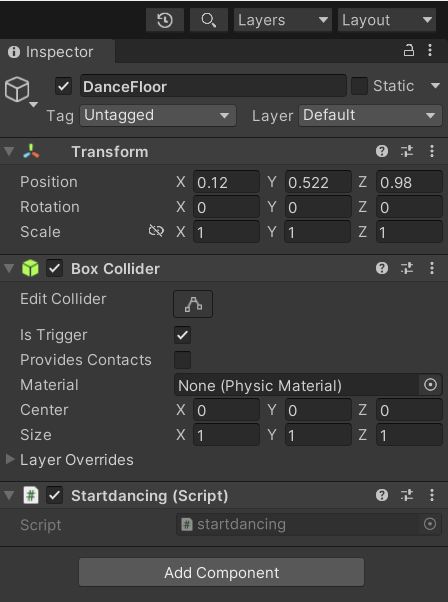
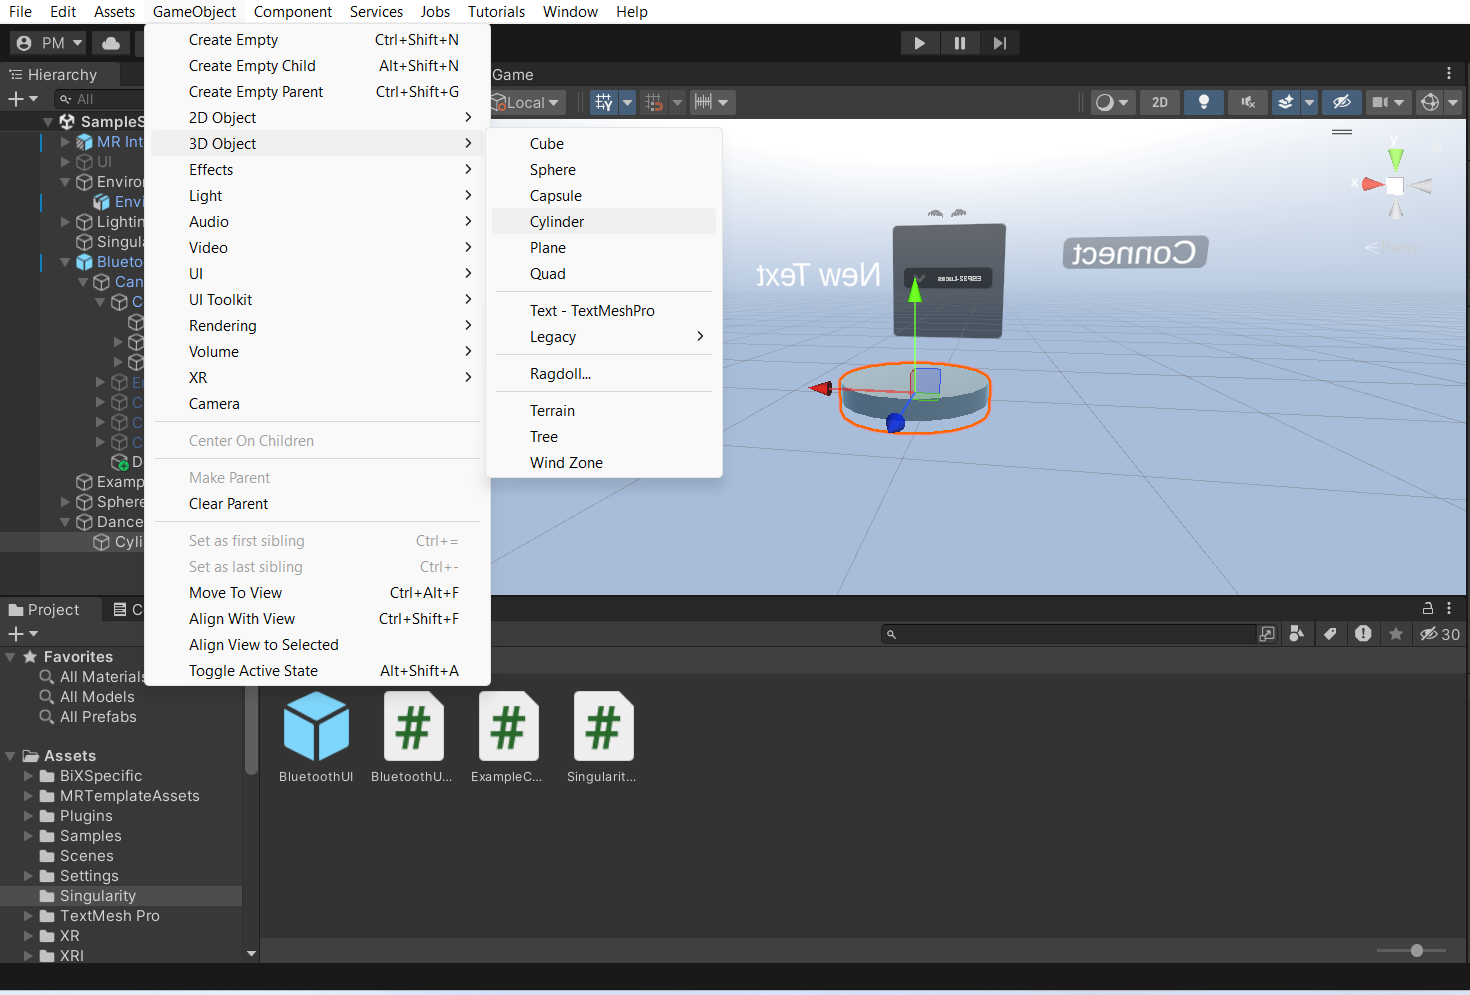
In Unity, create an empty gameObject and call it “DanceFloor”.
Add the component “Box collider” and select the collider shape, move it in front of the camera.
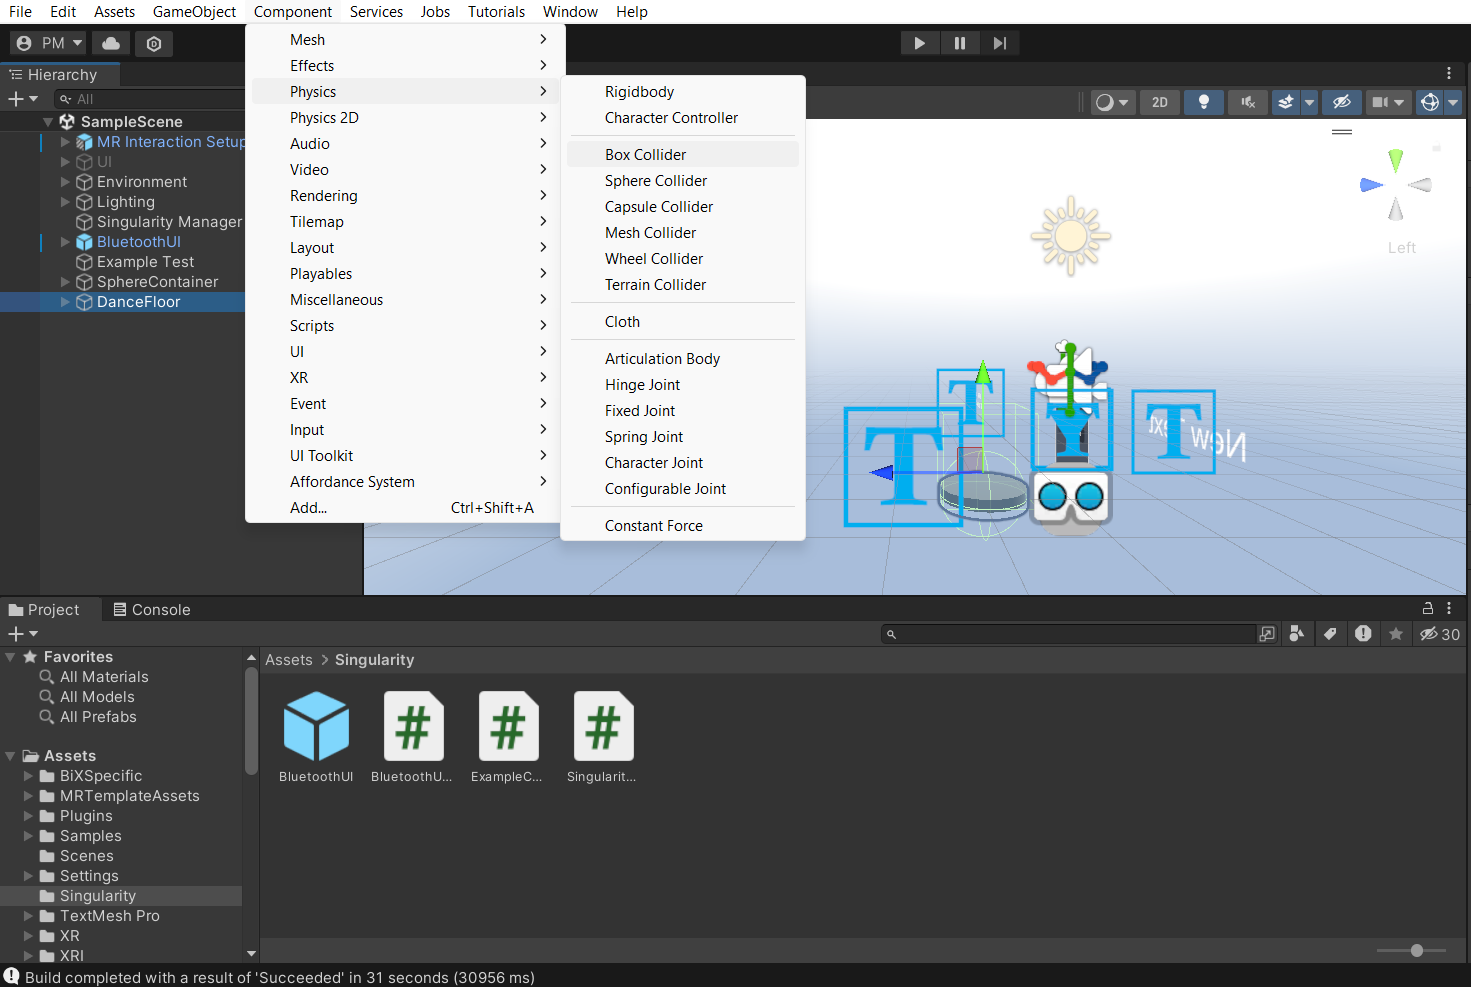
In the Inspector tab turn Is Trigger on.
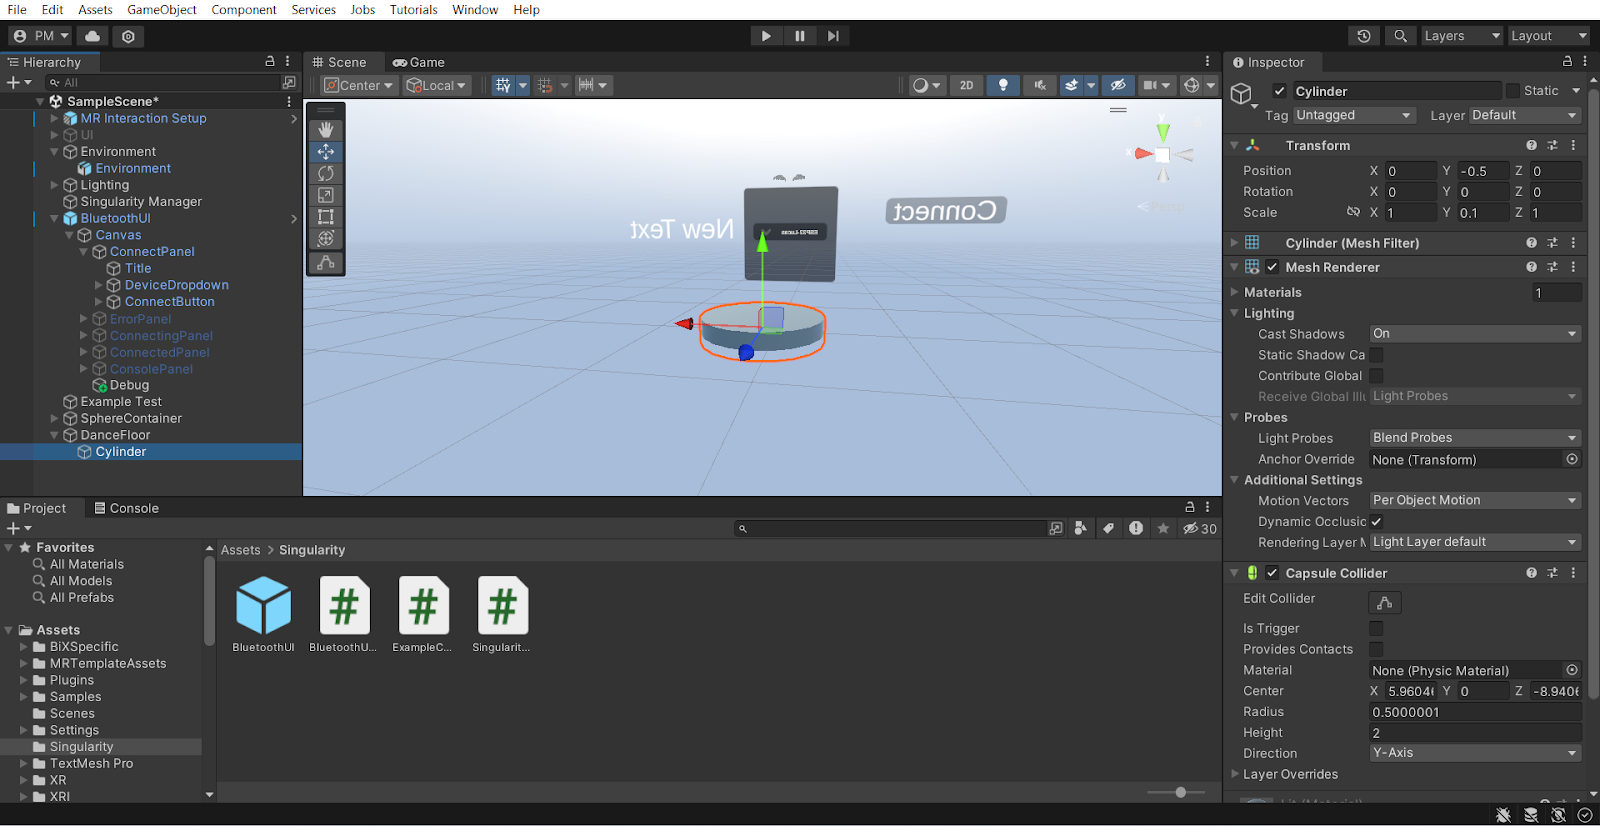
Inside the “DanceFloor” Object add a cylinder, set the y scale to 0.1 and the y position to -0.5.
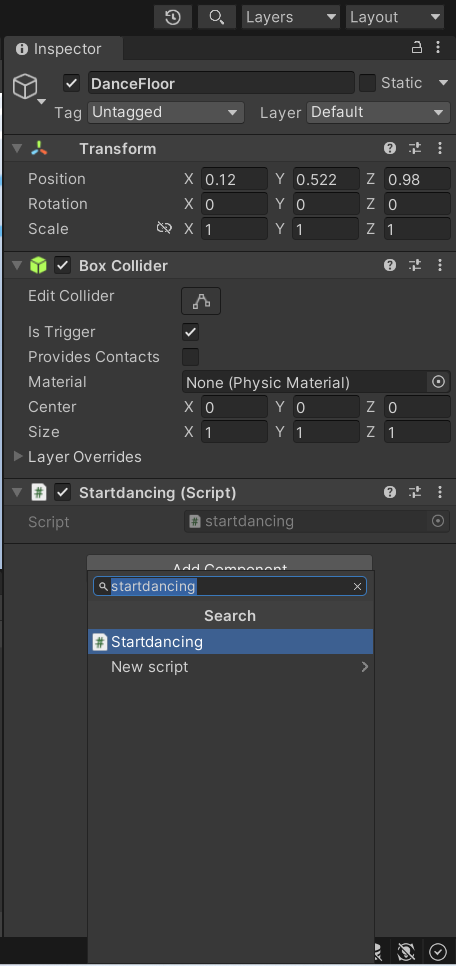
Create a script on the DanceFloor game object named “startDancing”
Add script to ExampleCommunicator
In Unity, open up the ExampleCommunicator script and add the following functions:

void OnTriggerEnter(Collision collision){  gameObject.FindObjectOfType<ExampleCommunicator>().startDance();
}
void OnTriggerExit(Collision collision){
gameObject.FindObjectOfType<ExampleCommunicator>().stopDance();
}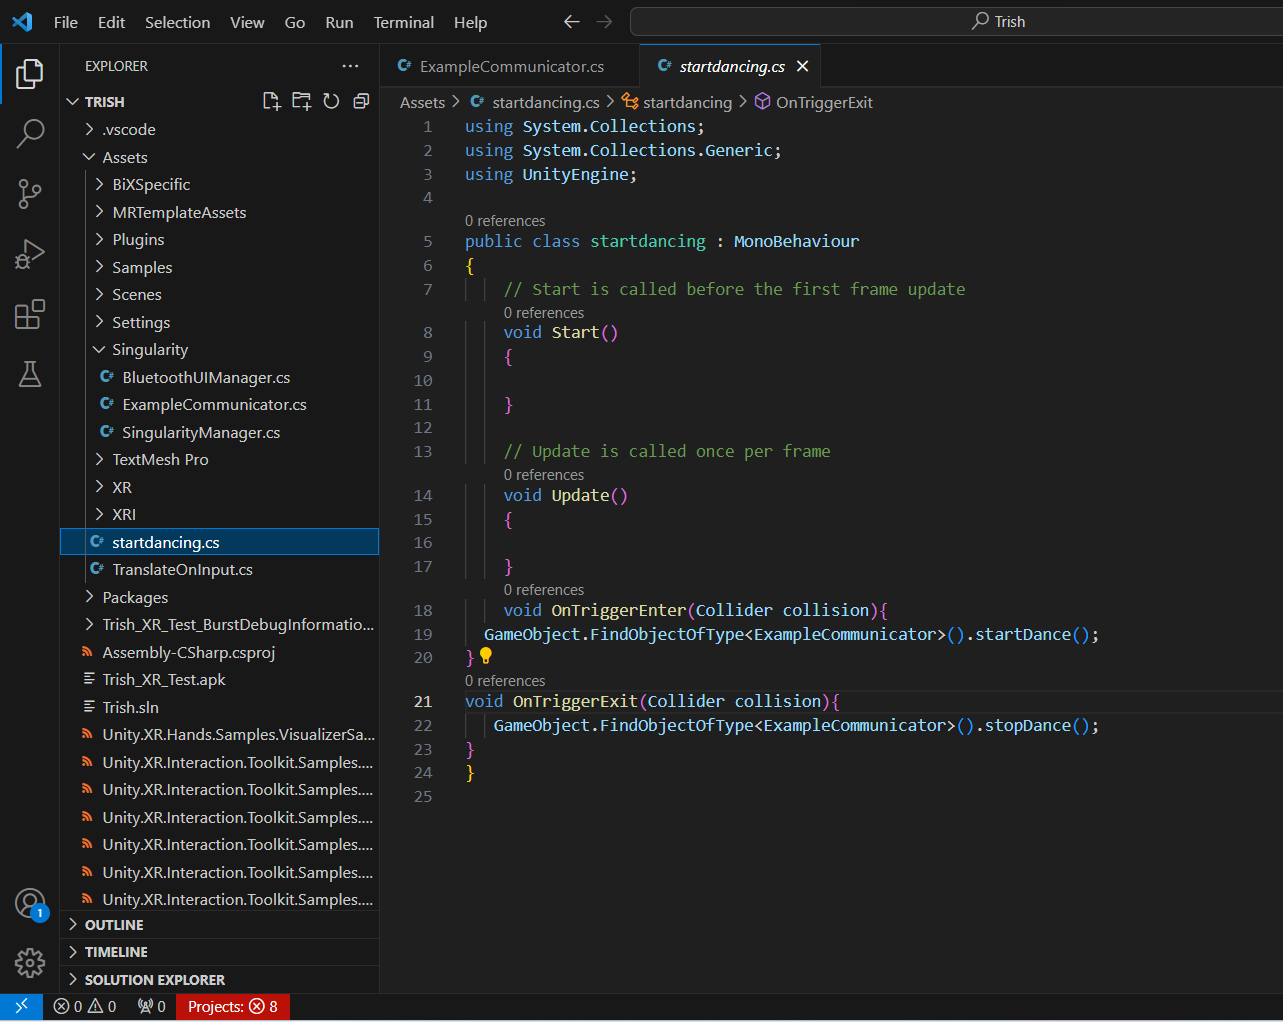
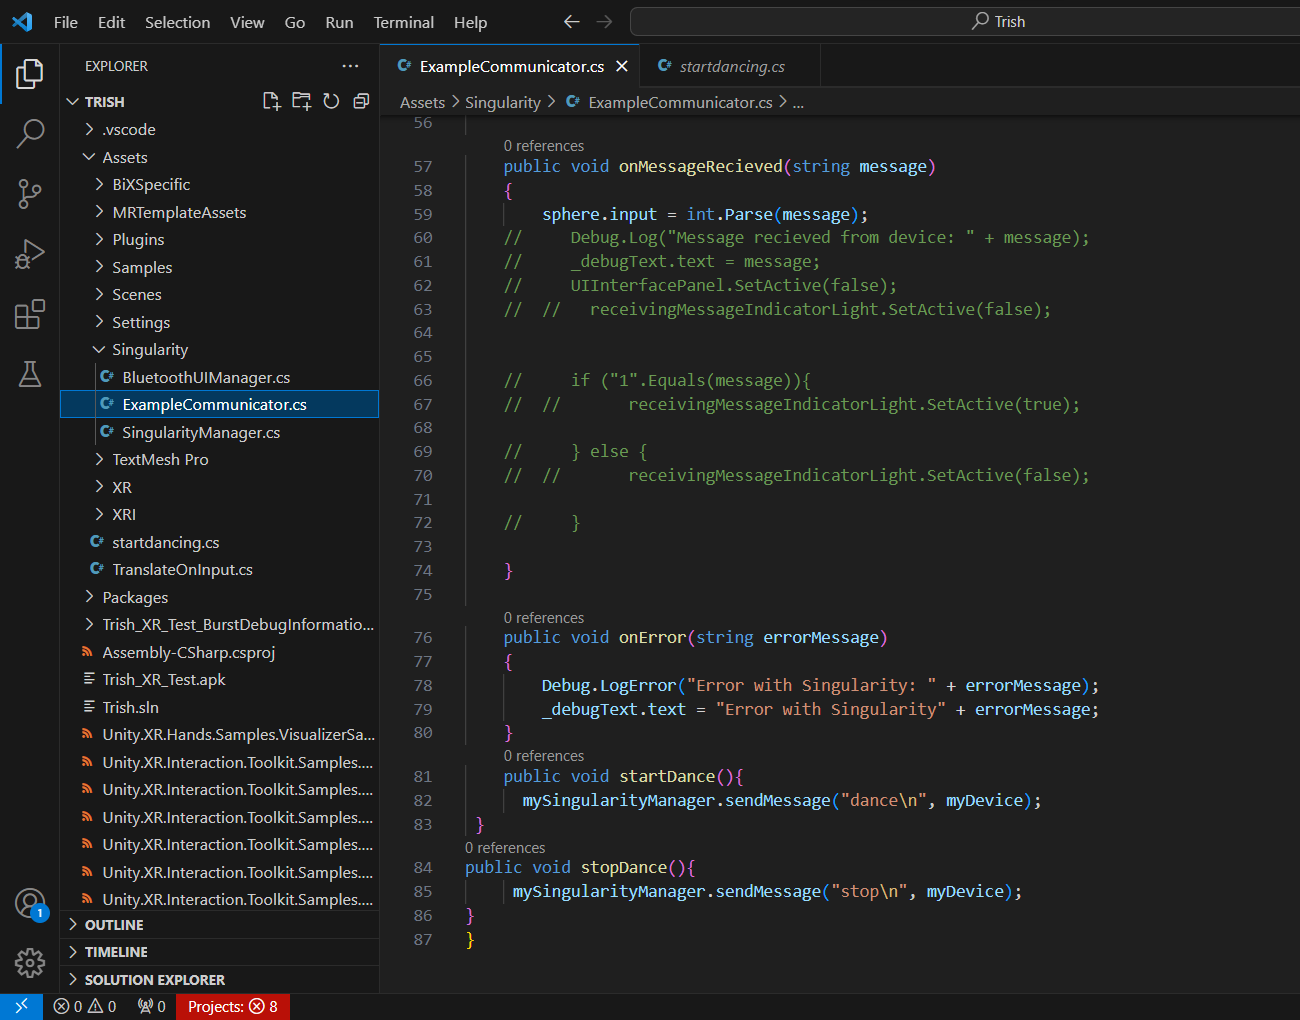
Inside the ExampleCommunicator script, create two new functions:
public void startDance(){
      mySingularityManager.sendMessage("dance", myDevice);
 }

public void stopDance(){
     mySingularityManager.sendMessage("stop", myDevice);
}
Save the script and return to Unity.
Build and Run as usual. Using your controller go over the Dancefloor surface and the motors will be activated.
Demo Video
Example tutorial by Trish Mwenda