
An example tutorial where you eat a virtual donut. This example demonstrates triggering physical events (in this case, haptic feedback) using interactable virtual objects and a collider in VR. We’ve also added a sound effect, just for fun.

What You Need
Electronic Supplies
- Adafruit ESP32 Feather V2
- Terminal Block Breakout FeatherWing
- Meta Quest 2 headset with link (high transfer usb-c) cable
- 1-2 mini vibration motor(s)
- Conductive ribbon with sticky side
- Alligator clips
Tools and Materials
- Double sided velcro
- Glue, tape, sewing materials, or some other fastener
- Scissors
Other
- This tutorial builds off of the BiX Unity Template 1.0
- It uses a low poly donut model that can be found in the #getting-started channel on our Discord. However you can use any 3D model you like.
Step by Step
Creating the virtual interactable object
Open the BiX Unity Template 1.0.
In the Hierarchy, add an Empty Game Object (Game Object > Create Empty)). This will be your interactable object (I’ve named it TastyDonut).
Go to Add Component and add the XR Grab Interactable.
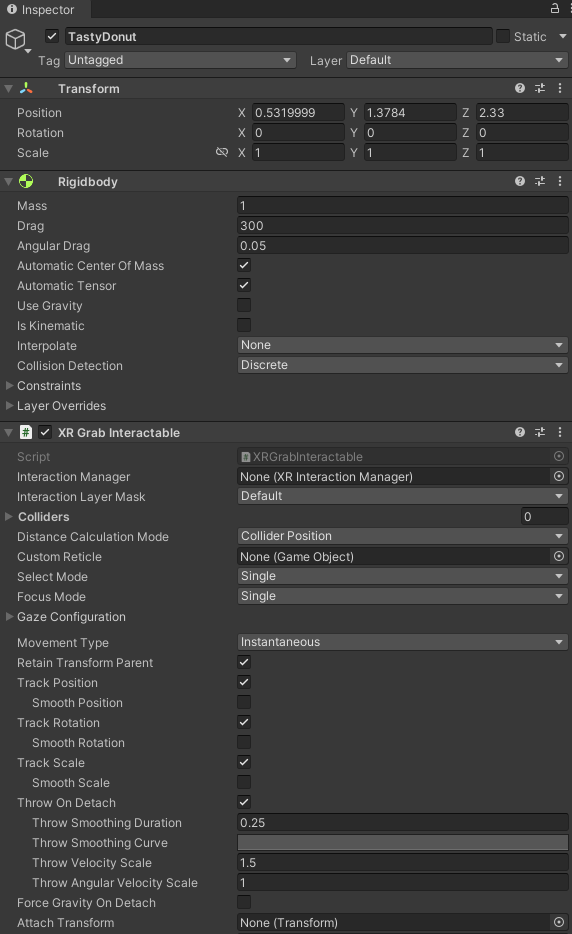
In the Inspector, under the Rigidbody, set the drag to 300, and turn off Use Gravity (this will have your object float slightly so it doesn’t drop out of view).
Import the Low Poly Donut (or a model of your choosing) into your Assets folder. Find the DonutStateO prefab and drag it onto TastyDonut. In the Inspector, set your (X, Y, Z) location to (0,0,0).
Position your donut somewhere where you will be able to grab it (i.e. close to your avatar), by moving the TastyDonut game object, either in your Scene window, or using the X,Y,Z coordinates in the Inspector. Make sure you are moving the TastyDonut object, and not just the model!
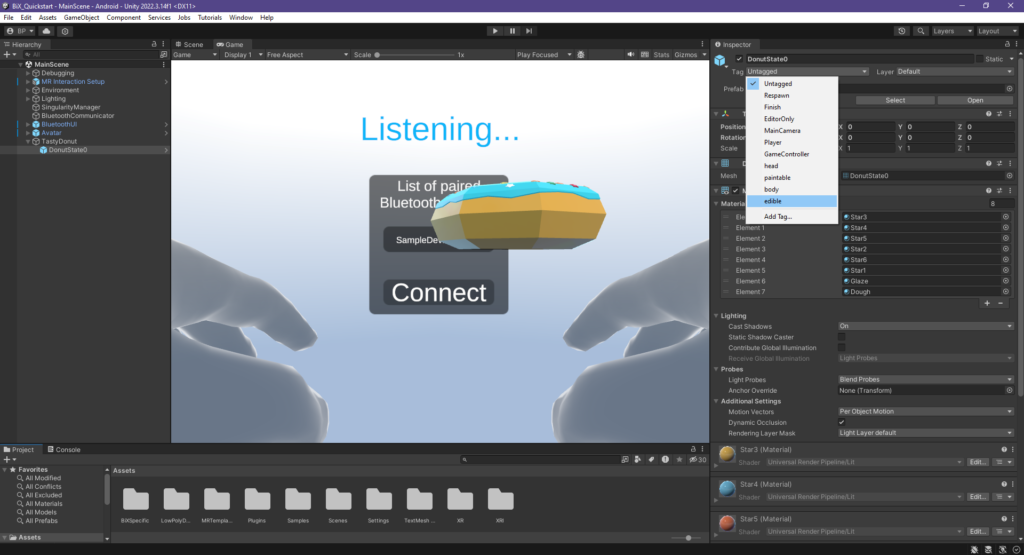
With DonutStateO selected, add a new tag in the Inspector (I named mine edible).
You may want to test your object at this point in VR, to make sure it is grabbable and moveable.
Preparing to send to the microcontroller
Open your ExampleCommunicator script. Add the following function:
public void CollideAndSend(bool collide)
{
   if (collide){
      // sends the message "chew" to the microcontroller
      // add the line break ("\n") so that the microcontroller
      // can understand the message is complete
      mySingularityManager.sendMessage("chew"+"\n", myDevice);
      } else {
      mySingularityManager.sendMessage("stop"+"\n", myDevice);
      }
}
It may seem weird to do this first, but we will need this function ready to go for a script we’re adding soon.
Creating the trigger collider (aka the chew zone) and script
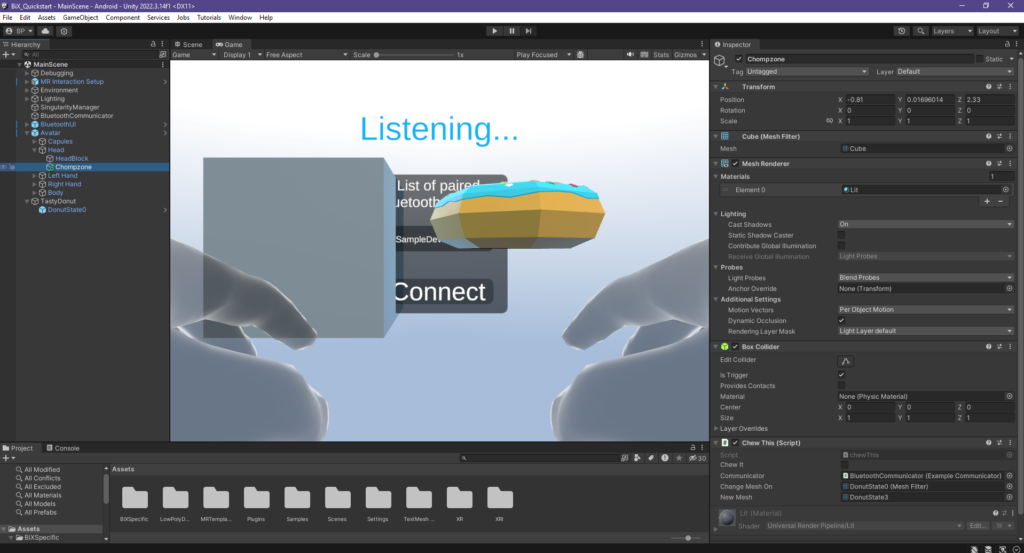
In your Hierarchy, select the Head object in the Avatar. Add a new 3D cube game object (This will be your collision zone. Note you could also add this directly to the HeadBlock, but the advantage of making a new game object with a mesh is that you can easily see the collision area for debugging.) You can name this anything you like (I called mine Chewzone).
Select the game object in your Hierarchy, and in the Inspector, under Box Collider, select Is Trigger.
In your Assets folder, create a new C# script and name it (I named mine chewThis). The script will look something like this:
using System.Collections;
using System.Collections.Generic;
using UnityEngine;

public class chewThis : MonoBehaviour
{
    // set a variable to track whether the donut is being chewed
    public bool chewIt;

    // send all messages to our bluetooth communicator to route
    // them to the microcontroller
    public ExampleCommunicator _communicator;

    // This is optional. It is a simple way to change the
    // visible part of the game object, so that it appears
    // to change state when you interact with it.
    // There are many ways to animate an object and you
    // can use the one that works best for you.
    [SerializeField] private MeshFilter changeMeshOn;
    [SerializeField] private Mesh newMesh;

    // Start is called before the first frame update
    void Start()
    {

    }

    private void OnTriggerEnter(Collider collider){
    // if an object with the edible tag hits the trigger
    // collider on this game object, the boolean variable
    // toggles to True.
        if (collider.gameObject.tag == "edible"){
                chewIt = true;
            }
   // the variable value is then sent to the communicator to
   // send to the microcontroller
            _communicator.CollideAndSend(chewIt);
   // a new function is then called to change the visible state
   // of the object
            eatThis();
    }

    private void OnTriggerExit(Collider collider){
   // on exit, everything changes back
        if (collider.gameObject.tag == "edible"){
                chewIt = false;
            }
            _communicator.CollideAndSend(chewIt);
    }

   // this function changes the mesh on the gameobject to a
   // new mesh. in this case, it changes the whole donut to one
   // with a bite in it.
    public void eatThis()
    {
        if (chewIt){
            changeMeshOn.mesh = newMesh;
        }

    }

}
Drag this script onto your collision zone. You should see it pop up in the Inspector panel.
Drag your Bluetooth Communicator object into the Communicator box.
From your TastyDonut gameobject, drag the DonutStateO prefab into the Change Mesh On box.
From your Assets folder, find the mesh you want to have replace the current one (I used DonutState3).
Test your game object. You should be able to grab the interactable object and drag it into your collision zone, and see the mesh change. Once this is working, you can resize and position your collision zone so that it is where you want it (in this case, on the head in front of the mouth. Once you are satisfied with where it is, select the collision zone gameobject in the Hierarchy, find Mesh Renderer in the Inspector, and uncheck it (this will remove the visible mesh on the collision area, leaving it invisible).
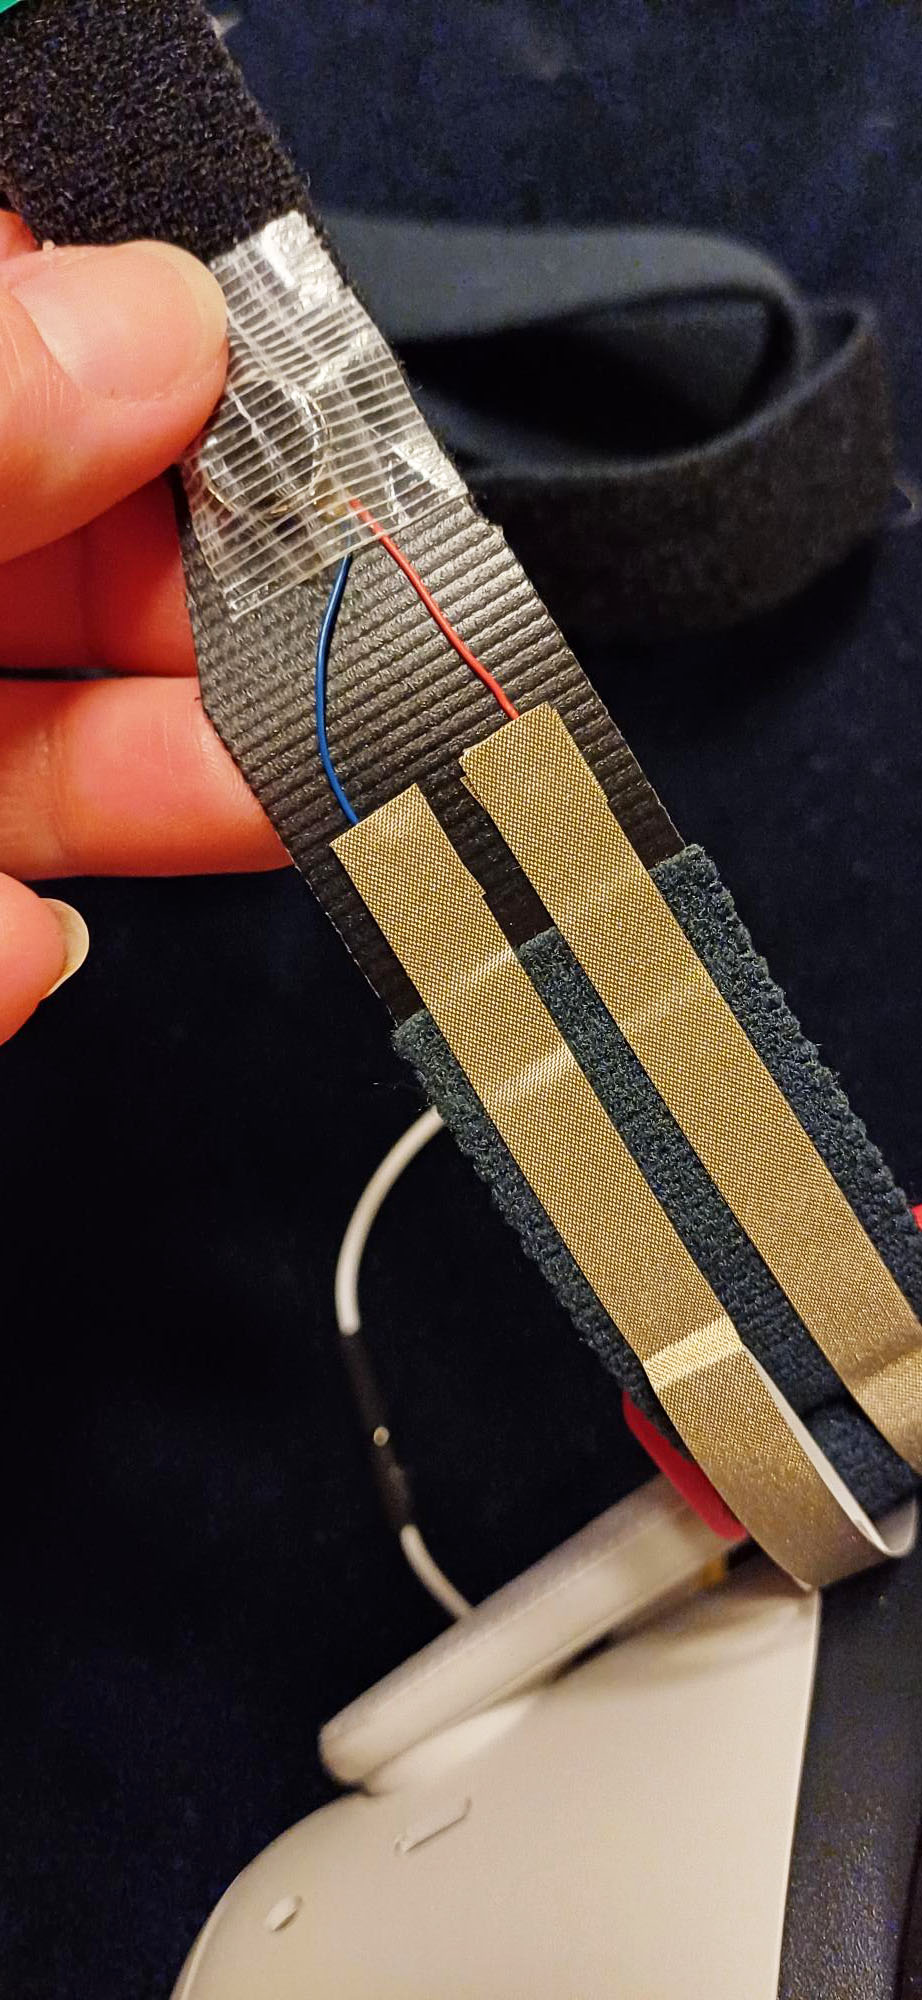
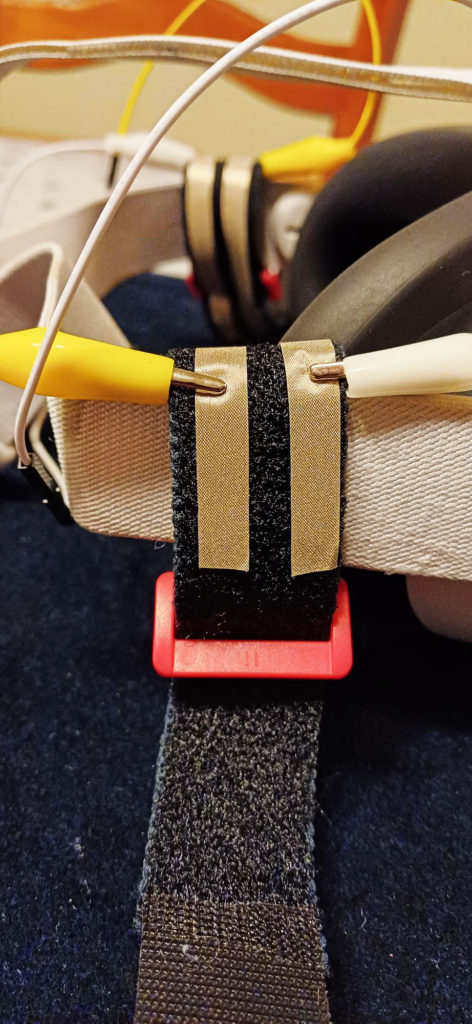
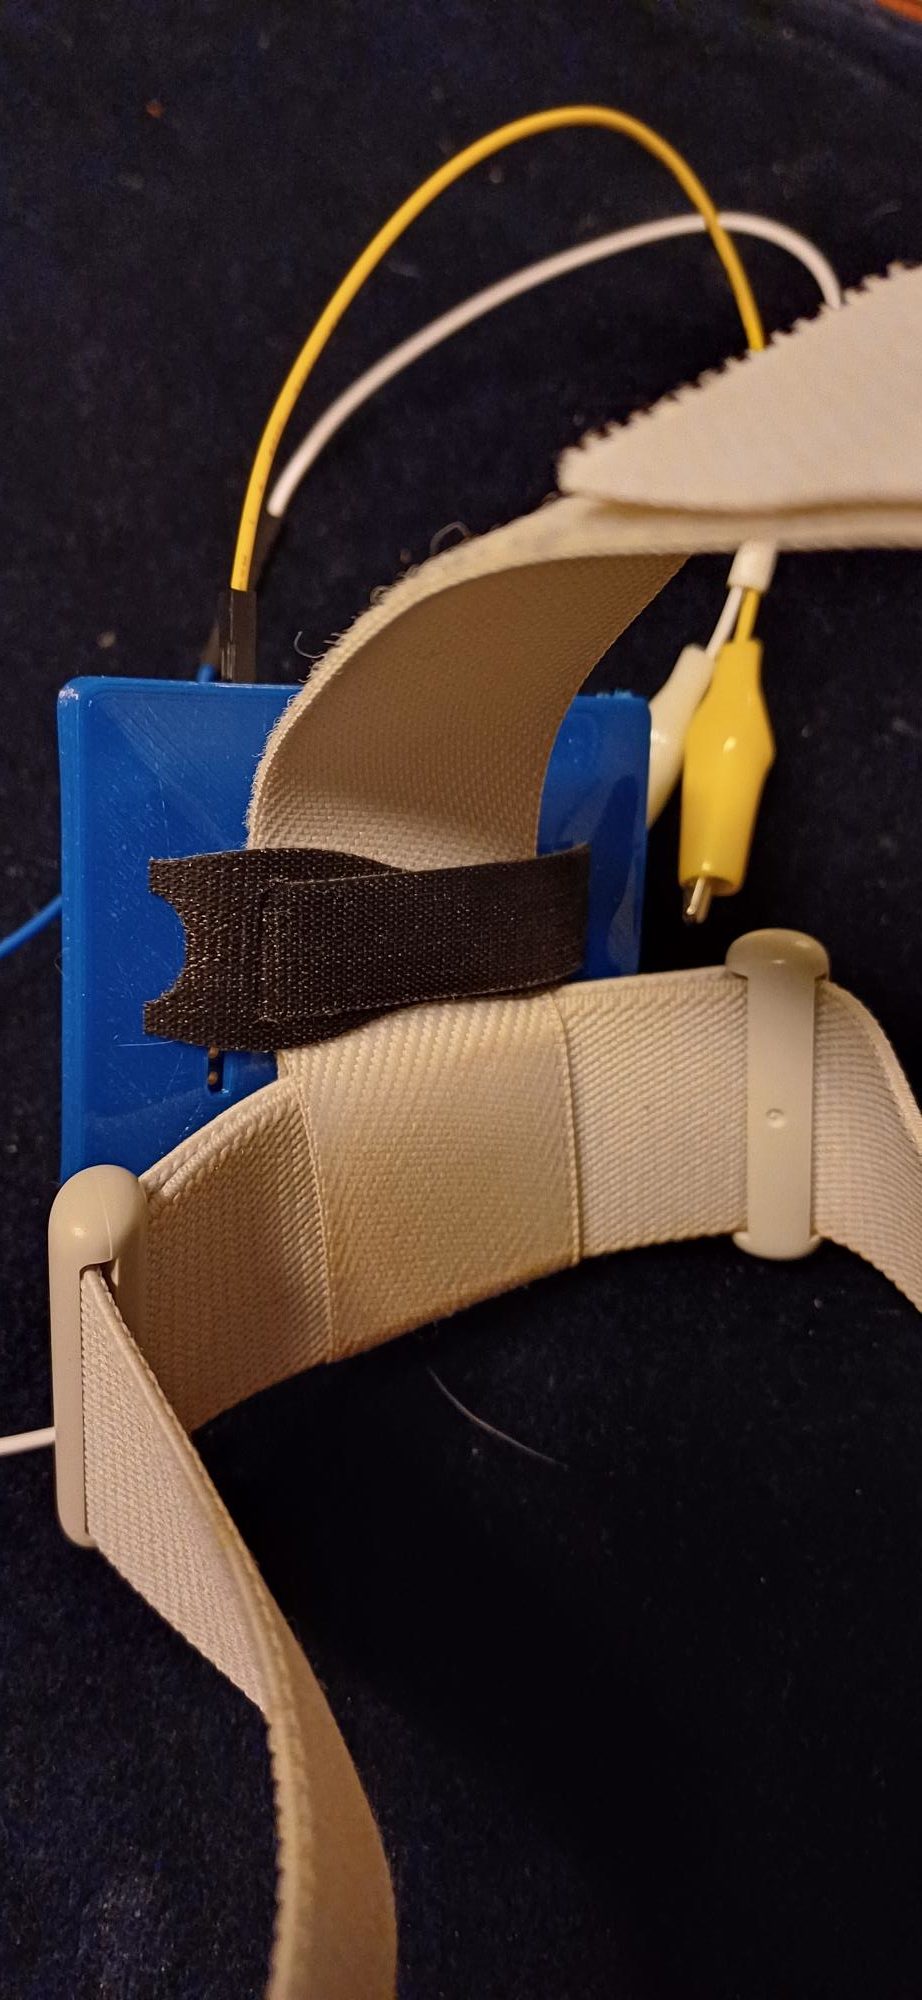
Creating the wearable
Step 1: The basic circuit
Take your vibration motors (you can use just one, but I have used two here for a slightly more immersive effect), and if need be, carefully strip off the covering to expose more of the wire inside.
Cut a small piece of conductive sticky ribbon and fold it over the wire at the ends. This will give you a bigger connecting surface to work with.
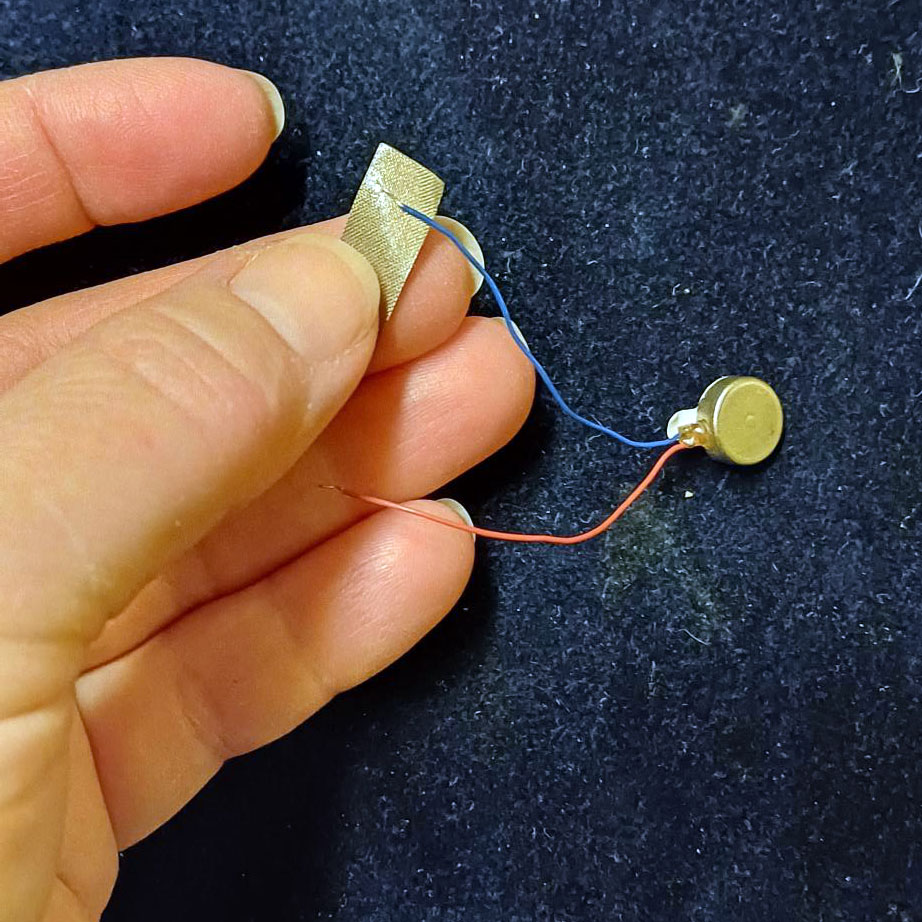
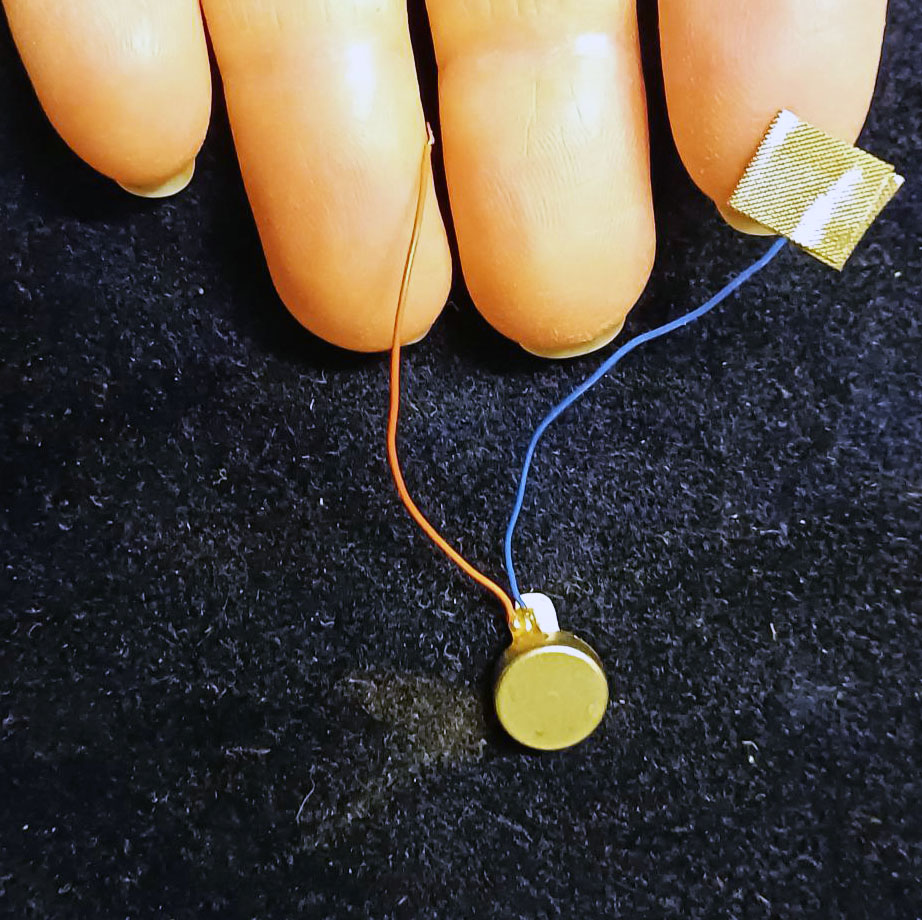
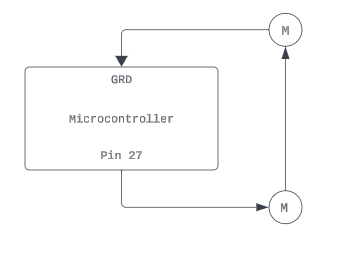
Grab two plug-to-clip alligator clips, and attach them to the Ground (GRD) and Pin 27 (or another digital pin of your choosing) on your microcontroller. Temporarily hook up the outgoing pin to the red wire on vibration motor 1, and the blue wire on vibration motor 2 to ground. Then use a clip-to-clip alligator clip to link up the outgoing wire on vibration motor 1 to the incoming wire on vibration motor 2. This completes your simple circuit.
Step 2: Arduino code
Open the simple return code in the Arduino IDE. If you haven’t done so already, change the default name of your microcontroller to match your microcontroller name in Unity.
Under BluetoothSerial BTSerial; add:
// this sets pin 27 as your outgoing pin
const int digPin = 27;
In void setup(), change pinMode to set pin 27 as an output, and then set it to LOW (aka off) to start:
pinMode(digPin, OUTPUT);
digitalWrite(digPin, LOW);
In void loop(), replace the if statement after if (BTSerial.available() > 0), after String data = BTSerial.readStringUntil(‘\n’); with the following:
    if (data == "chew"){
      // this turns on the vibe motor(s)
      digitalWrite(digPin, HIGH);
      // then we wait for a beat, and turn off the motor
      // the effect is a burst of vibration, not a constant
      // buzz
      delay(1000);
      digitalWrite(digPin, LOW);

    } else if (data == "stop") {
      digitalWrite(digPin, LOW);
    }
  }
Step 3: Finishing the wearable
Just for fun
Step 1: Adding sound effects
While it’s not strictly necessary, it is fun to add sound effects to this interaction.
Find or create a sound effect audio clip, and import it into your Assets folder (.wav files work well). Add the following code to your chewThis script.
Before your public class chewThis : MonoBehavior declaration, add:
[RequireComponent(typeof(AudioSource))]In your variables, add two new ones:
   public AudioClip nameitsomething;
   AudioSource audioSource;
In Start, add:
audioSource = GetComponent<AudioSource>();And in OnTriggerEnter, after chewIt = true; add:
audioSource.PlayOneShot(nameitsomething, 0.7f);Save your script. With your collision zone game object selected, you should now see a spot to drag in your audio file from your Assets (in the Inspector, it will be under Chew This (script).
Once you’ve added the audio file, you will see it appear as an Audio Source. Make sure you un-check Play On Awake.
Finally, your project will need an Audio Listener component. You can add this anywhere, but I would recommend adding it to the MR Interaction Setup game object. Just select it, and in the Inspector, Add Component > Audio Listener.
Example tutorial by Cindy Poremba.